The Complete Guide to Mulching Your Native Garden: Types, Techniques, and Common Mistakes
Mulching is one of those garden tasks that seems simple—scatter some material around your plants, job done. But like most things in gardening, the details matter. The wrong mulch, applied incorrectly, can actually harm your plants. The right mulch, applied well, transforms garden performance with minimal ongoing effort.
For native gardens especially, good mulching mimics the natural forest floor where leaf litter accumulates, retaining moisture, suppressing competition, and slowly improving soil. Understanding how to replicate this process effectively is one of the most valuable skills a New Zealand gardener can develop.
Why Mulching Matters
Let's start with why you should bother mulching at all. The benefits are substantial:
Moisture retention: Mulch dramatically reduces water loss from soil. In New Zealand's variable climate— where we can swing from drought to deluge within weeks—this buffering effect keeps roots in consistent conditions. You'll water less frequently and your plants will suffer less moisture stress.
Temperature moderation: Mulch insulates soil, keeping roots cooler in summer and warmer in winter. This temperature stability encourages stronger root development and reduces stress on plants.
Weed suppression: A thick mulch layer prevents weed seeds from germinating by blocking light and creating a physical barrier. Weeds that do emerge are easier to pull from mulched soil.
Soil improvement: Organic mulches break down gradually, adding organic matter to soil. This improves soil structure, drainage, water retention (these aren't contradictory—good soil does both), and biological activity.
Aesthetic appeal: A well-mulched garden looks tidy and intentional. Bare soil between plants reads as unfinished; mulch reads as design.
Mulch Types for New Zealand Gardens
Different mulches suit different situations. Here's what works for native gardens:
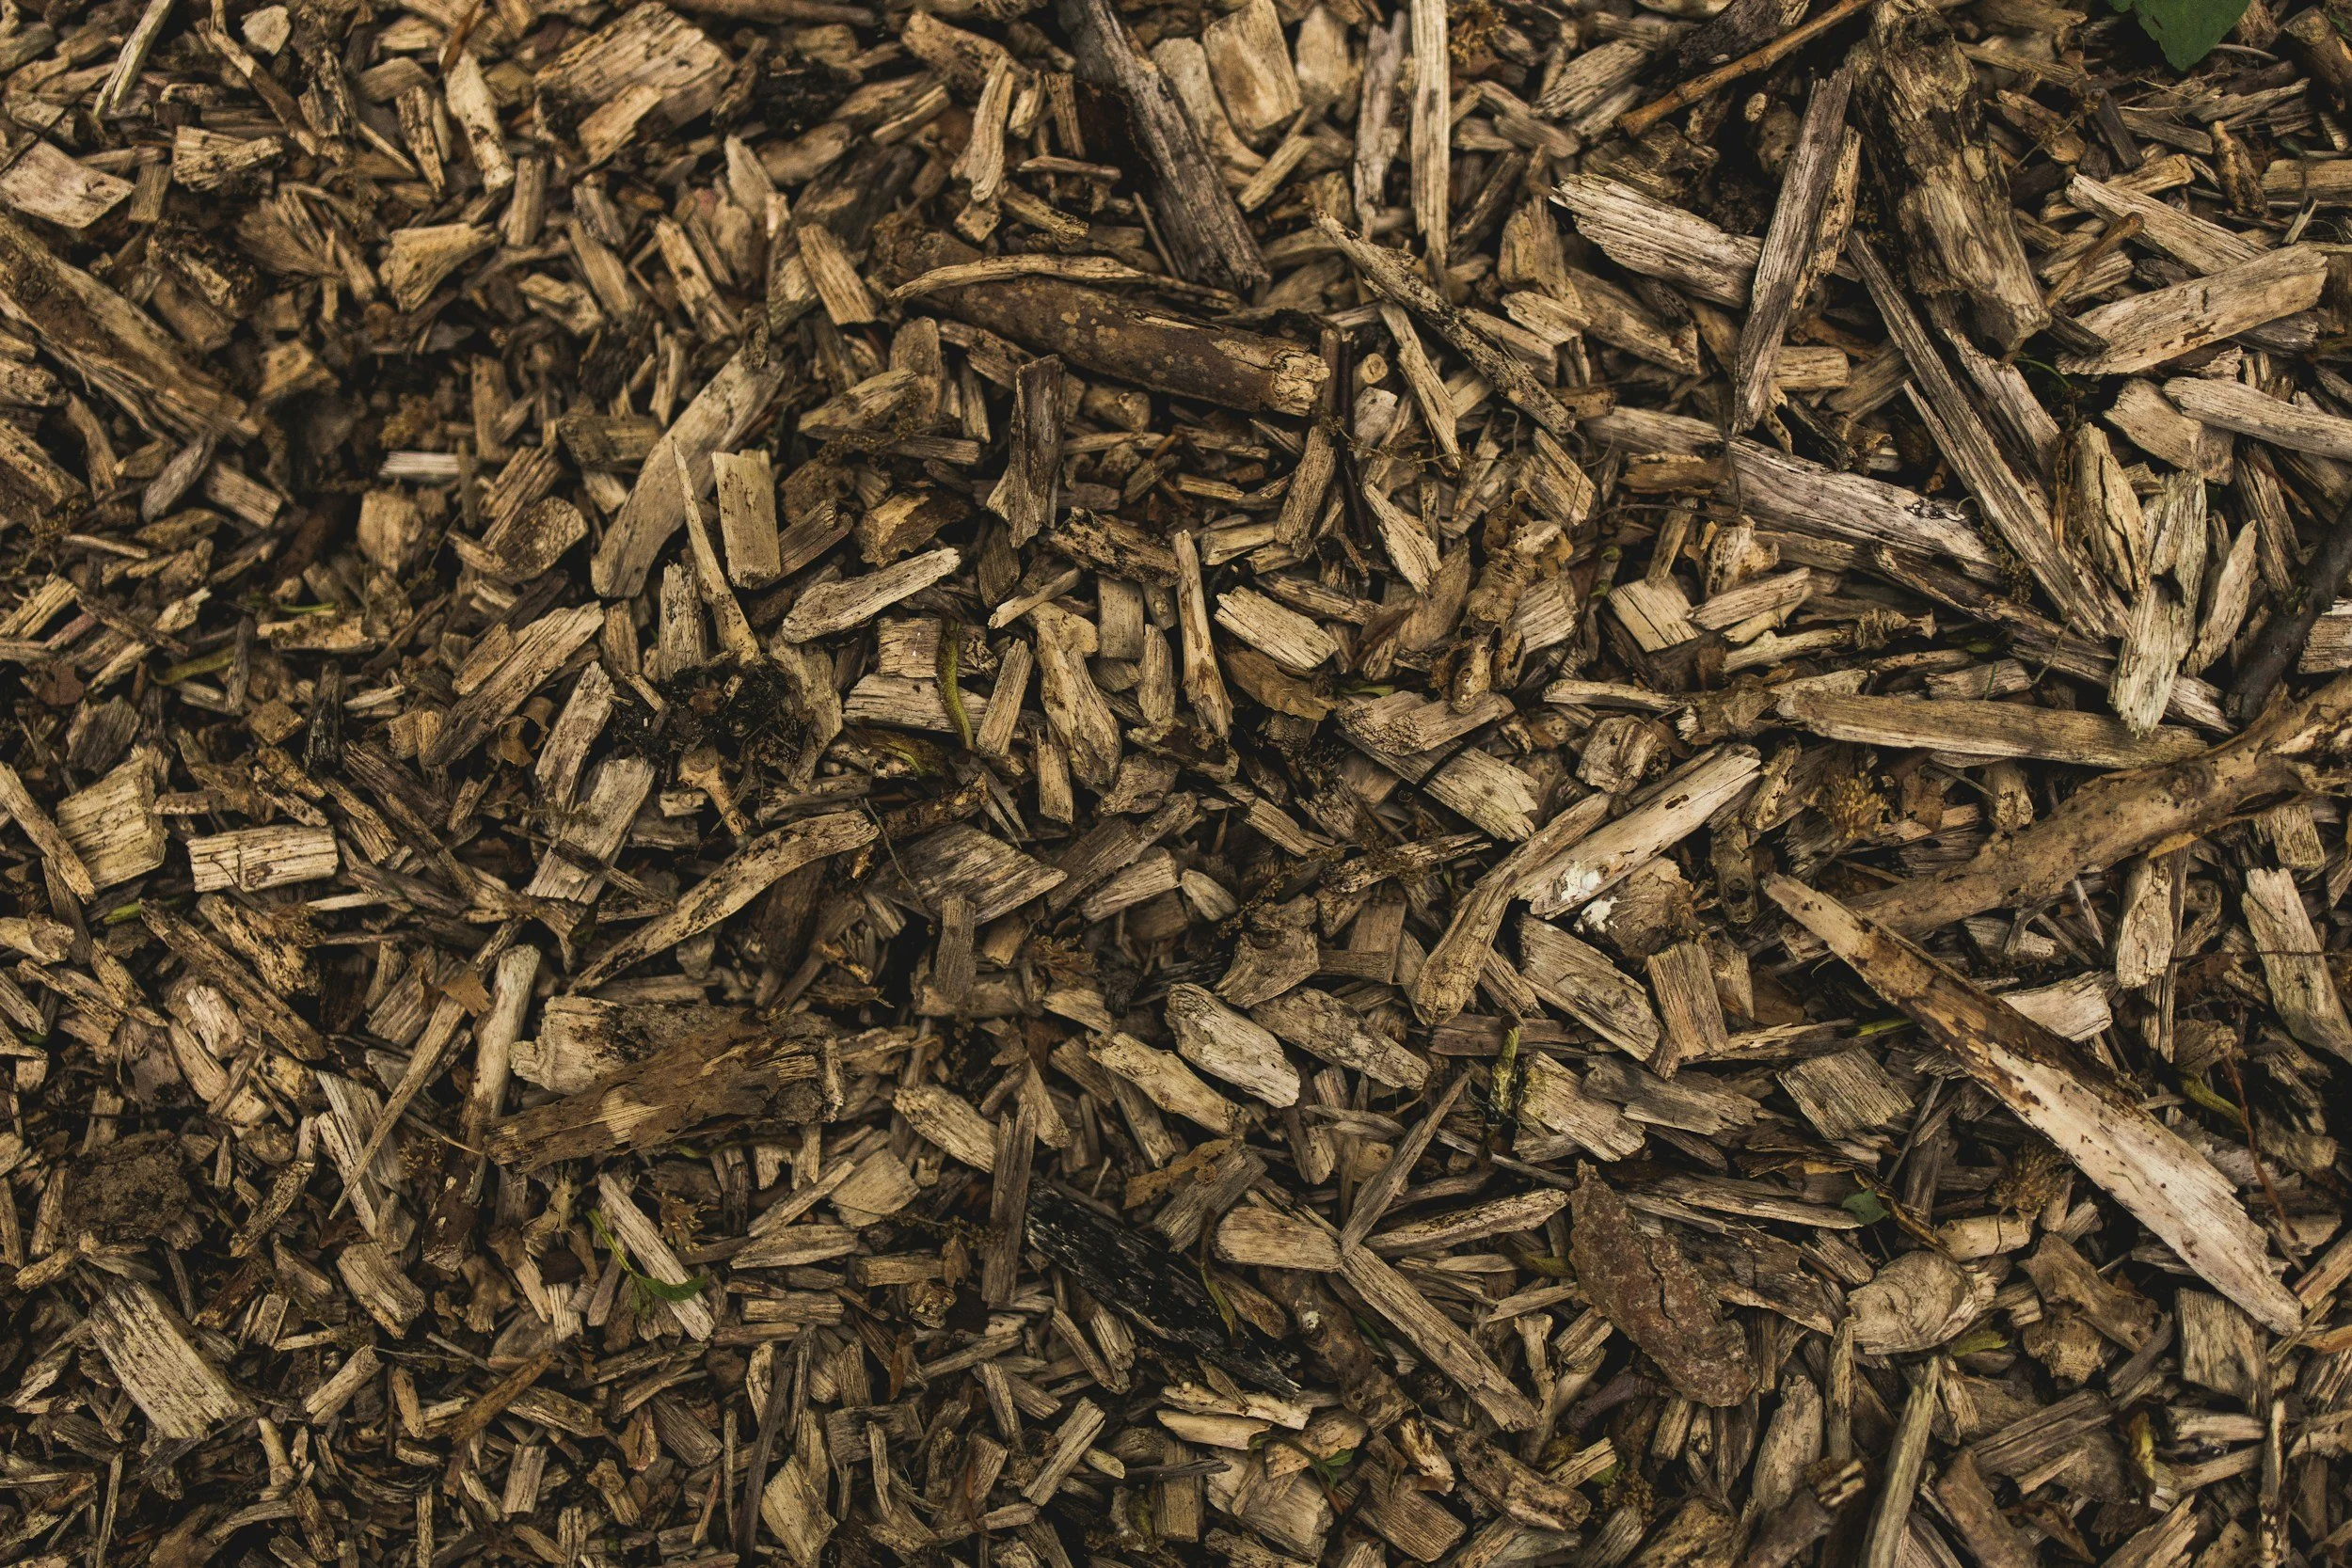
Bark and Chip Mulches
The most common mulch choice in New Zealand gardens. Bark mulches come in various grades from fine to coarse:
Fine bark (5-15mm) breaks down relatively quickly, improving soil faster but needing more frequent topping up. It suits ornamental plantings where a refined appearance matters.
Medium bark (15-25mm) is the workhorse—breaks down at a reasonable rate, looks good, and doesn't blow away easily. Suitable for most situations.
Coarse chip (25mm+) lasts longest but can look chunky in refined settings. Best for larger gardens, native bush plantings, or situations where you want minimal maintenance.
Considerations: Bark mulches are slightly acidic, which suits most native plants. Fresh bark temporarily depletes nitrogen as it breaks down—apply around established plants rather than newly planted seedlings, or add a light nitrogen feed when mulching.
Living Mulch (Groundcovers)
In natural bush, the "mulch" is often living groundcover plants. This approach works brilliantly in native gardens.
Advantages: Living mulch provides all the benefits of traditional mulch plus additional biodiversity, flowers, and wildlife habitat. It never needs topping up.
Disadvantages: Takes time to establish, requires more initial investment, and not suitable where you want to access soil easily (like vegetable gardens).
Good choices: Native groundcovers like Muehlenbeckia, Selliera, Pratia, or spreading coprosmas make excellent living mulch in native gardens.
Leaf Litter and Garden Compost
Partially composted leaves or garden compost make excellent mulch, particularly for native gardens.
Advantages: Breaks down rapidly, improving soil quickly. Free or low cost if you make your own. Supports soil biology exceptionally well.
Disadvantages: Needs frequent topping up (twice yearly at minimum). Can look untidy. May contain weed seeds if compost isn't properly heated.
Application: Works best combined with coarser mulch—a layer of compost next to soil, topped with bark for appearance and longevity.
Pebbles and Stones
Inorganic mulches like pebbles don't improve soil, but they offer specific advantages:
Advantages: Never break down or need topping up. Excellent for alpine or rock garden settings where organic mulch looks inappropriate. Prevent rain splash on low plants.
Disadvantages: Don't improve soil. Heat up significantly in sun, potentially stressing roots. Difficult to remove weeds from. Expensive over large areas.
Best uses: Alpine plant collections, gravel gardens, around succulents and coastal natives that prefer sharp drainage.
What Not to Use
Some materials commonly suggested as mulch are better avoided:
Fresh lawn clippings: Mat down, go slimy, and smell. Compost them first.
Newspaper or cardboard: Breaks down rapidly and blows around. If using, always cover with proper mulch.
Black plastic: Prevents water and air reaching soil. Can cook roots in hot weather. Only useful short-term for killing weeds.
Dyed or treated mulches: Unknown chemicals aren't worth the risk in gardens where you want healthy soil biology.
Applying Mulch Correctly
Good technique is as important as good material.
Depth
7-10cm is ideal for most bark and chip mulches. Less than 5cm isn't effective for weed suppression; more than 15cm can prevent water penetration and encourage surface rooting.
For fine materials like compost, 3-5cm is plenty—they're denser and don't need the same depth.
The Critical Gap
Keep mulch away from plant stems and trunks. This is the most important mulching rule, and the one most commonly broken.
Mulch piled against stems creates a constantly moist environment that encourages collar rot—fungal infection that girdles and kills plants. Leave a clear gap of at least 10cm around stems, creating a "doughnut" of mulch around the plant rather than a pile over it.
For trees, this gap should extend 15-20cm from the trunk. The root flare should be visible, not buried.
Preparing Before Mulching
Remove weeds first. Mulch suppresses future weeds but won't kill existing ones. Weeds with strong root systems (kikuyu, convolvulus, oxalis) will grow straight through mulch if not removed first.
Water if soil is dry. Applying mulch to dry soil locks in drought rather than moisture. Water thoroughly before mulching during dry periods.
Consider edging. A defined edge between mulched beds and lawn makes maintenance easier and looks tidier. Timber, steel, or stone edging prevents mulch migrating onto paths and lawn.
When to Apply
Autumn is ideal—soil is still warm, autumn rains settle mulch naturally, and plants benefit from insulation over winter.
Spring works well too—top up winter-depleted mulch before summer heat arrives.
Avoid midsummer unless essential—hot, dry mulch can be hydrophobic (repelling water) and may steal moisture from soil rather than conserving it.
Mulching Different Situations
Newly Planted Gardens
Wait 2-4 weeks after planting before mulching, allowing roots to begin establishing. Use finer mulch grades that won't smother small plants. Apply thinner layers (5-7cm) initially, topping up as plants grow.
Established Plantings
Annual topping up maintains depth as mulch breaks down. Add 3-5cm each autumn to maintain total depth of 7-10cm. Don't disturb existing mulch—just add on top.
Native Bush Gardens
Aim for a natural appearance. Coarse chip or leaf litter suits better than refined bark. Irregular depth (5-15cm varying across the area) looks more naturalistic than uniform coverage. Leave some bare patches—natural bush has varied ground conditions.
Sloping Ground
Coarser mulches stay put better on slopes—fine material washes away in heavy rain. Consider using living mulch (groundcovers) instead, particularly on steep slopes.
Around Vegetables and Annuals
These areas need frequent soil access. Use finer mulches that are easy to move aside. Or skip mulching entirely and rely on intensive planting to shade soil.
Mulching Problems and Solutions
Mulch blowing away: Use heavier grades (larger chips), wet mulch after applying, or add edging to contain it.
Weeds growing through: Mulch is too thin, or weeds weren't removed before mulching. Top up depth or hand weed and re-mulch.
Water beading on surface: Dry mulch can become hydrophobic. Wet thoroughly or rake to break surface crust.
Fungal growth: Harmless decomposer fungi sometimes appear on mulch—white threads or small mushrooms. They're actually beneficial, breaking down material and improving soil.
Collar rot on plants: Mulch is piled against stems. Pull back to create proper gap immediately.
Nitrogen deficiency (yellowing plants): Fresh mulch is depleting nitrogen. Apply nitrogen-rich fertiliser, or wait—the problem resolves as mulch matures.
The Mulched Garden
A well-mulched garden is a pleasure to maintain. Watering becomes less frequent and critical. Weeds are minimal and easy to pull. Soil steadily improves without deliberate amendment. Plants look better with less effort.
Yes, mulching costs money and time initially. But the ongoing savings—in water, weeding time, and plant losses—more than compensate. Mulching isn't glamorous, but it might be the highest-return activity in garden maintenance.
Your plants' roots will thank you. Your future self—spending less time watering and weeding—will thank you. Get mulching.